Single Sign-On with Azure AD
How to configure an Azure AD enterprise app for SSO
This document provides instructions to configure Veza SSO as a custom SAML integration. It's now possible to install Veza as an official Azure AD gallery application, following instructions from Microsoft.
To enable single sign-on for Azure Active Directory users, you will need to create a new enterprise application for Veza, and configure both Veza and the enterprise app to enable the SAML connection. The steps in this guide walk through creating the Azure enterprise app and setting up SSO.
With Single Sign-On active, AAD users assigned to the Veza enterprise app (directly or via group membership) can opt to log in using your identity provider when browsing to the Veza home page, without the need to provision a new user ahead of time. If IdP-initiated flow is enabled, authenticated AAD users can access Veza directly from their Azure app portal, without a login prompt.
SSO users have the
access_reviewerrole by default. A Veza administrator can change IdP user roles after the account has first logged in.You can save time by obtaining your Service Provider URN and SSO URL from your Veza support team. Otherwise, you can retrieve these after creating an AAD enterprise app and retrieved the IdP URLs and signing certificate.
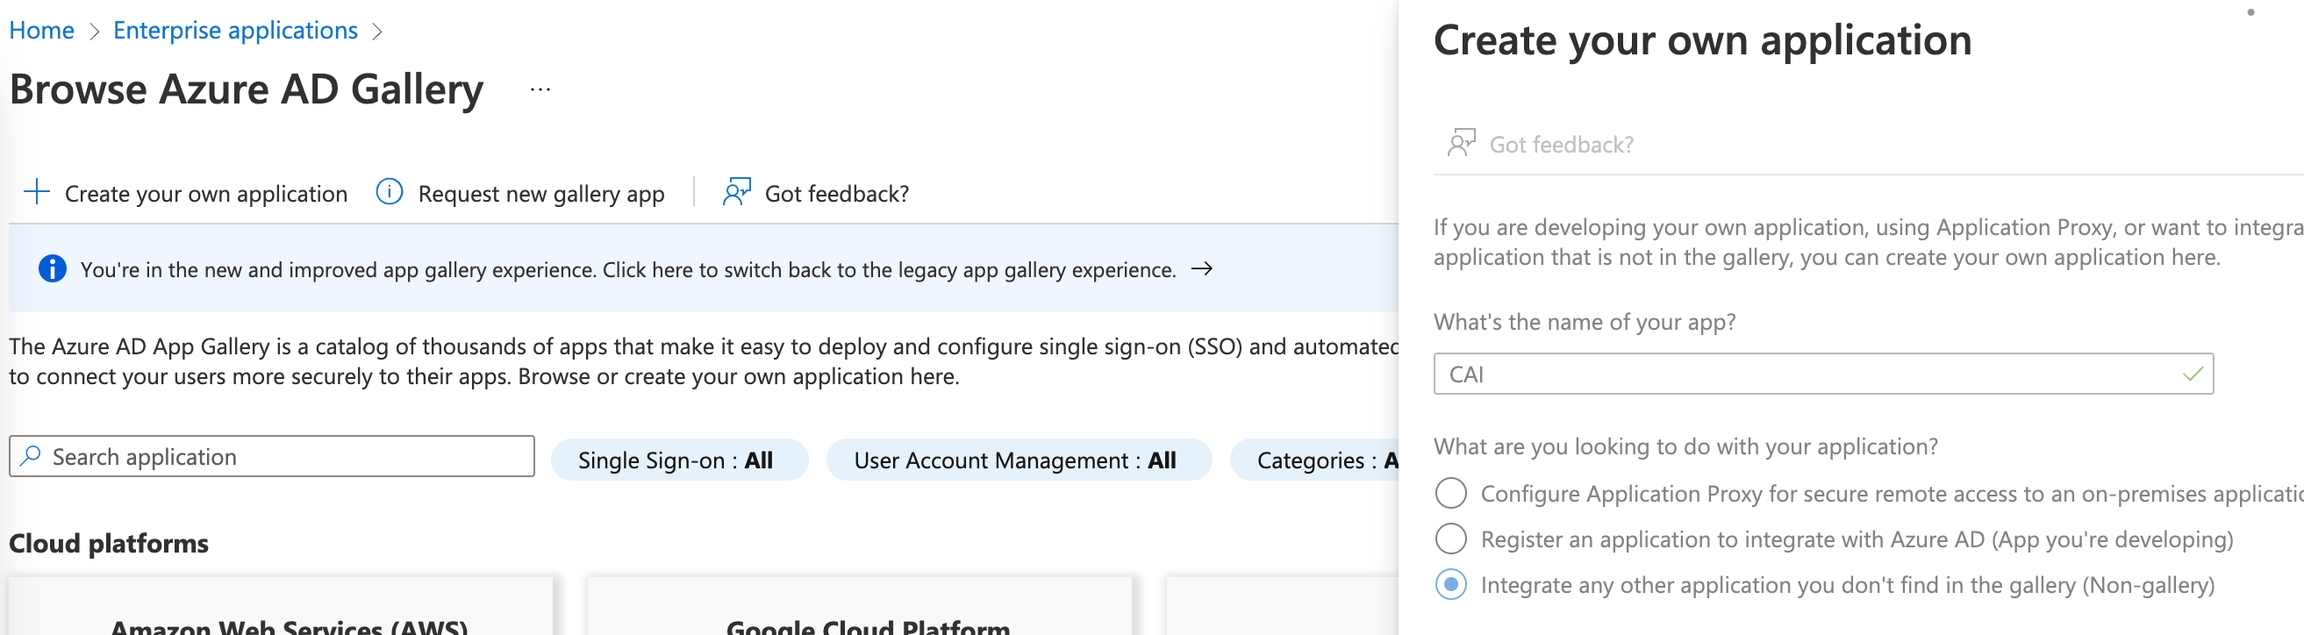
1. Create an AzureAD Enterprise Application
From your Azure Portal, navigate to Enterprise Applications > New Application > Create your own application. Choose "non-gallery" as the app type:
Open the Single sign-on panel, and select SAML as the sign-on method.
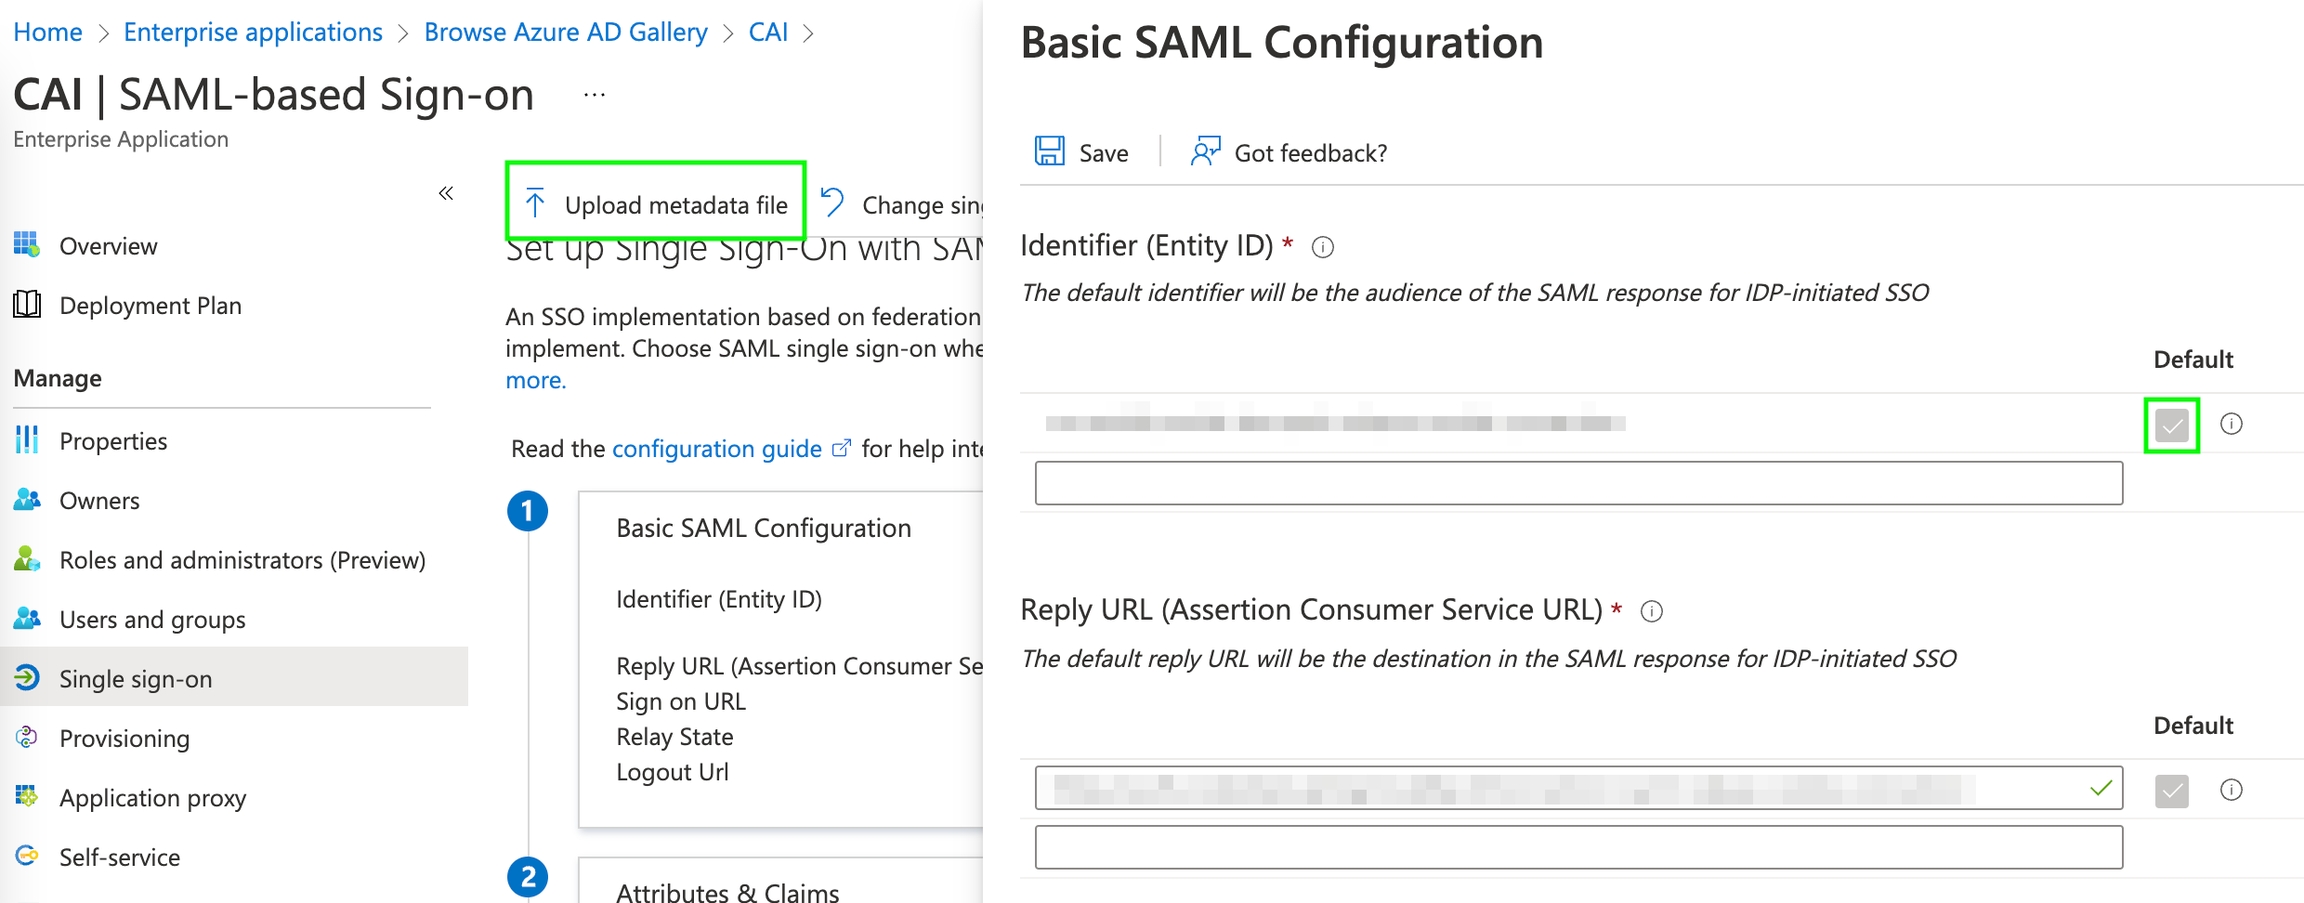
2. Edit the basic SAML configuration
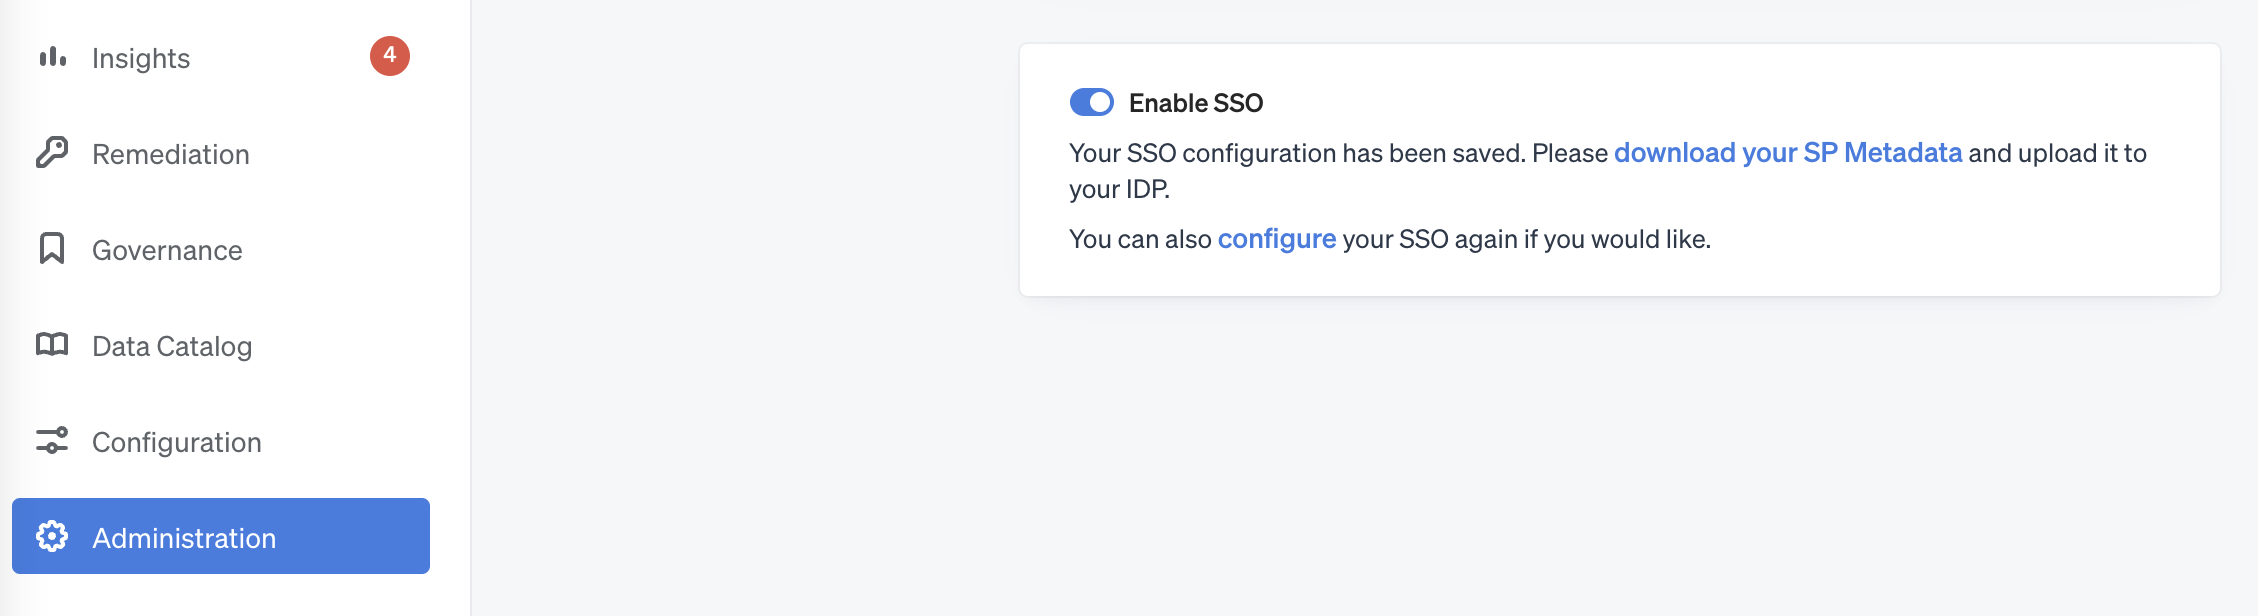
Get the information required to configure the app by navigating to Veza Administration > Sign-in Settings. Click Configure to enable SSO, and copy the values at the top of the wizard.
Configure the application:
Reply URL: The Veza Single Sign on URL (ACS), e.g.https://your-org.vezacloud.com/auth/saml/acs. This can also be retrieved from theLocation=value in the downloaded SP Metadata.Identifier (Entity ID): The Veza Audience URI (Entity ID), for examplehttps://earlypreview.cookiebeta.ai/auth/saml/metadata. This is theentityID=value in the downloaded SP Metadata URL.Sign-On URL: Leave blankRelay state: Leave blankSave the configuration.
Scroll down to the SAML signing certificate section. Download the Base64 certificate.
Under section 4) Set up, copy the
Login URL,Azure AD Identifier, and optionalLogout URL.
2. Configure Veza
In another window, navigate to Veza Administration > Sign-in Settings. Configure a new SAML connection:
Set the
Sign-in URLto your Azure ADLogin URLUpload the base64 certificate from AAD as the
X.509 Signing CertificateSet the
Issuer IDto theAzure AD IdentifierTo log users out of AAD when logging out from Veza, enable single logout (SLO) by setting
Sign Out URLto the AADLogout URLSelect Enable Request Signing. Leave the encryption algorithm and protocol binding at the default values (
SHA-256,HTTP-POST).Upload an icon to use as a logo on the Veza home page.
To permit users to sign in directly from their Azure AD portal with an unsolicited SAML response to Veza, toggle Enable IDP-initiated login.
Save the connection, and download the SP metadata at the provided URL.
3. Finish configuring SSO for the AAD Enterprise App
Return to the AAD enterprise application's SSO settings, and upload the metadata from Veza:
The
Identifier,Reply URL, andLogout URLwill change to the imported values.Set the
Sign In URLto the same destination as theAssertion Consumer Service URL
4. Enable and verify the SSO connection
Return to Veza Administration > Sign-in Settings and toggle Enable SSO.\
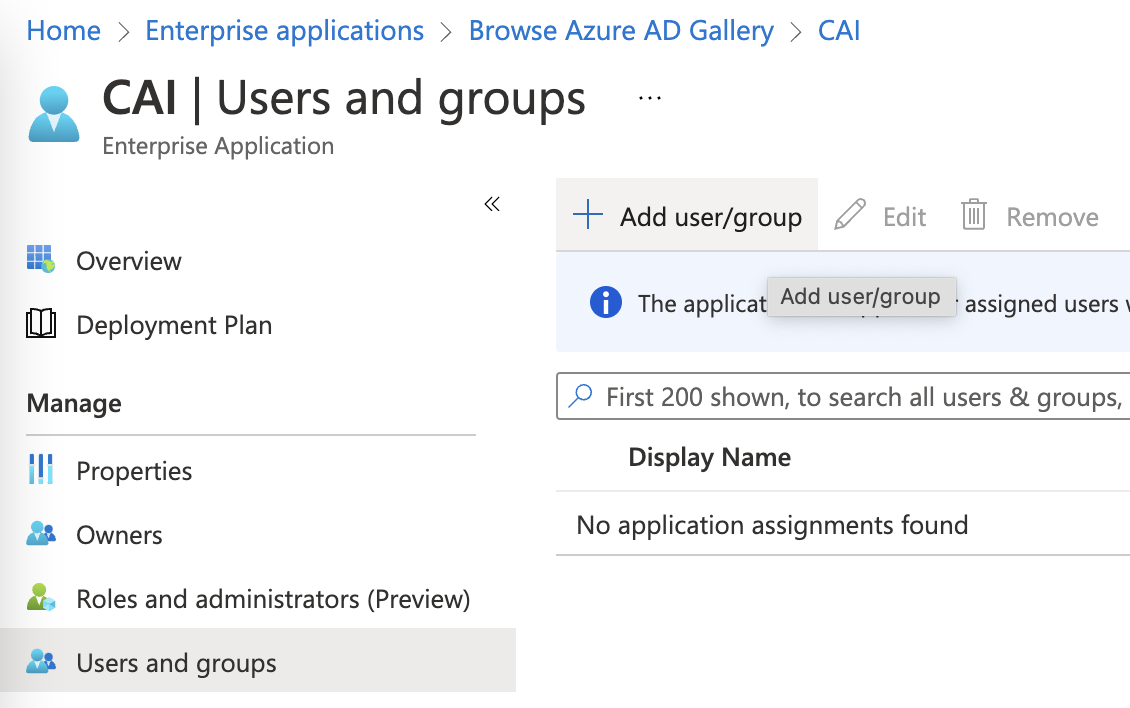
Ensure that your Azure AD user is assigned to the Veza enterprise application. To assign users and groups, navigate to the Azure app's Users & Groups > + Add user/group:\
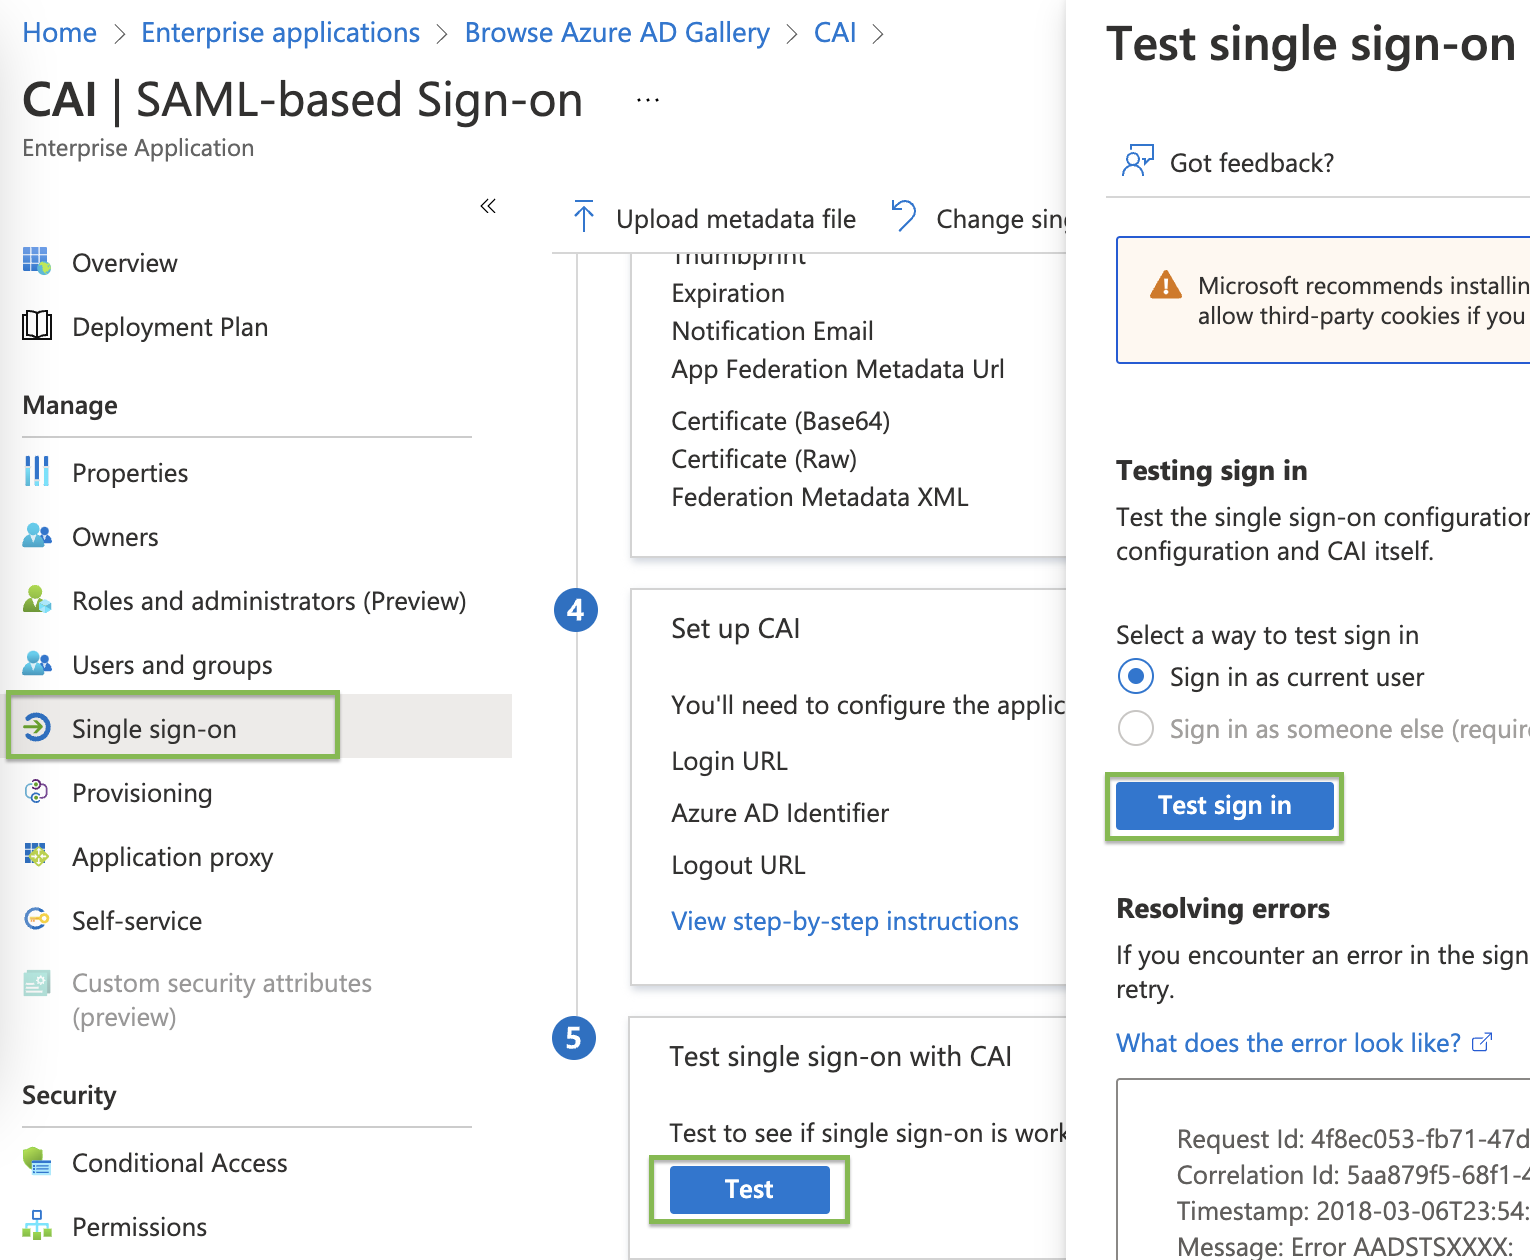
If IdP-initiated SSO is enabled, you can test the connection from Azure using the Test option under enterprise app Single Sign-on settings, or using the "User access URL" available under properties:\
To test SP-initiated SSO, navigate to the landing page of your Veza instance, and choose Continue with SSO. You should be redirected to Azure AD for authentication.
Last updated